
27 Feb 2015
Fitness Fridays: The beginning

26 Feb 2015
Winter Favourites
Hello!!

Labels:
beauty,
charles worthington,
elemis,
lifestyle,
love tanya,
maybeliene,
real techniques,
Tanya burr,
v05
19 Feb 2015
Seeing red
Hello!
The ones for beginners
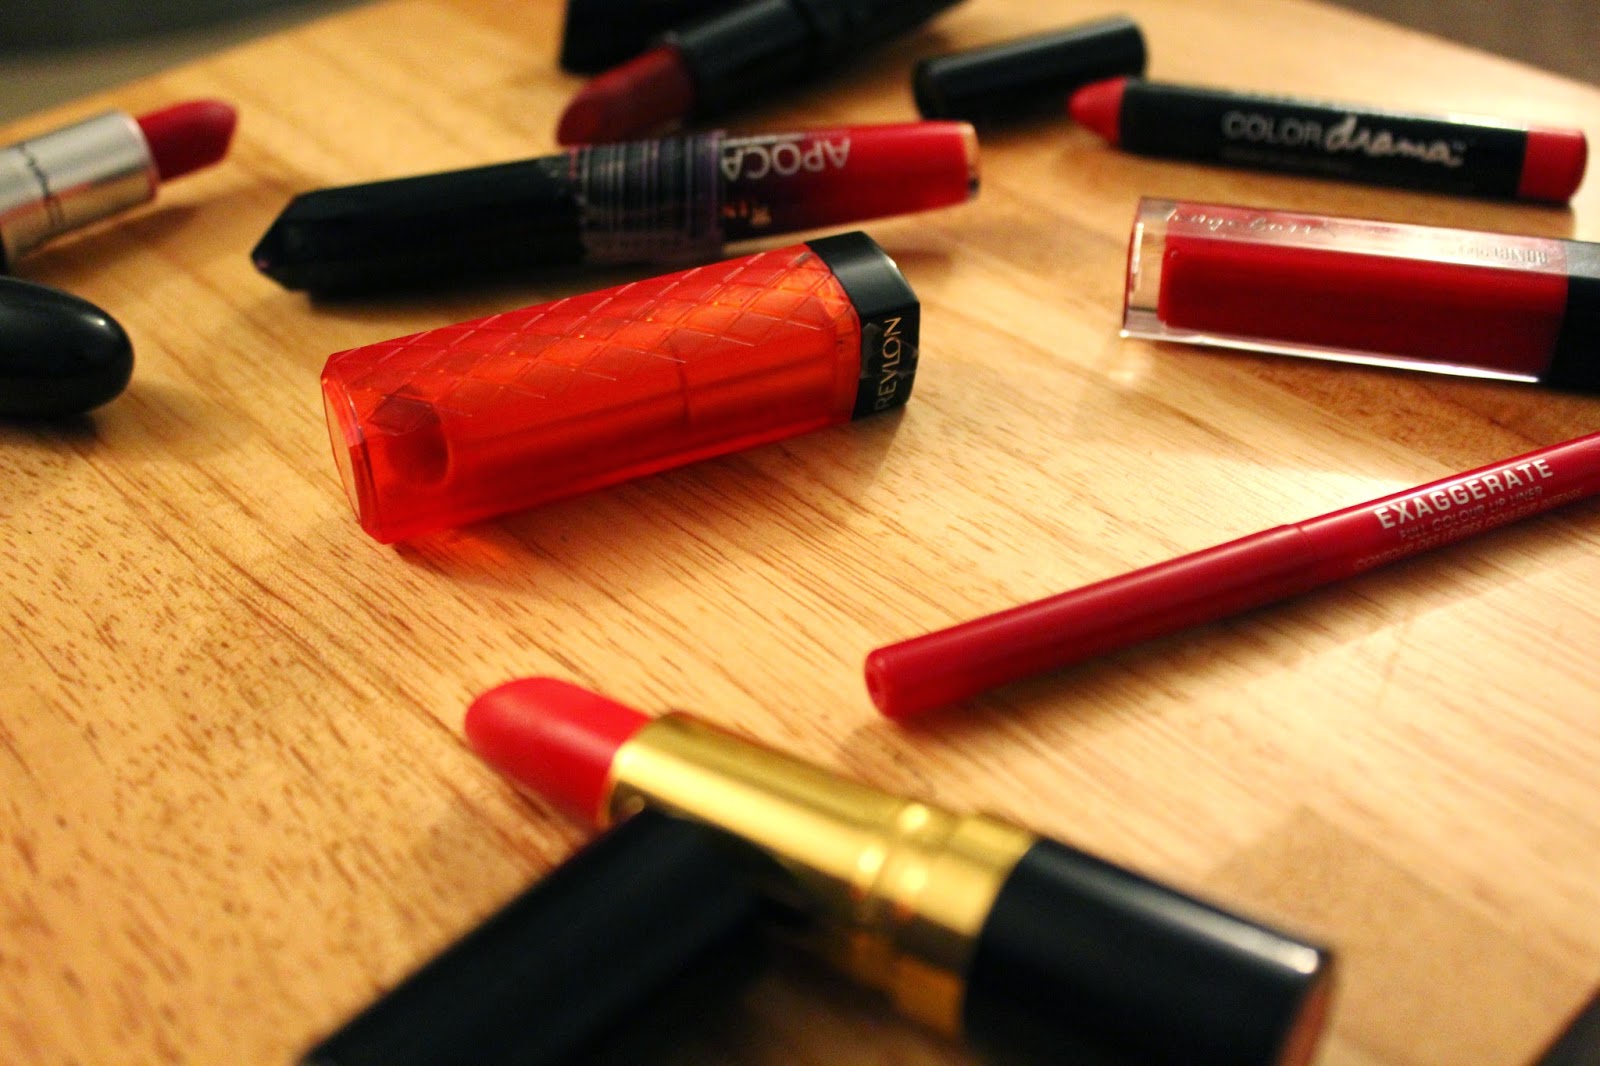
If your just starting to dip your toes into the red lipstick sea then it's best to start with something a little more sheer. For me the easiest way to do this is with a gloss or tinted lip balm. I personally like the Tanya Burr lip gloss in Vampire kiss as it goes on quite sheer to start with but can be built up to a stronger colour. The Revlon lip butters are a huge favourite of mine in general and the colour candy apple is a lovely shade of red. This is a hybrid between a tinted lip balm and a lipstick and I absolutely love it. Again, can be quite sheer but can be built up to a deeper red.
The ones for precision
Lipsticks that you can shove on, on the go, without a mirror are great but sadly they don't often come in reds so anything that helps with precision is great. Using a lip liner like the Rimmel exaggerate in Red Diva is great for lining the lips and then its just a case of filling in the gaps. Lipstick crayons are brilliant too, I love the Maybelline colour drama in light it up for this. It's a lovely consistency and colour and is so easy to apply because of the shape.
The ones that won't budge
There is nothing worse than putting your red lippy on in the morning and then looking in the mirror later to find it smudged on random parts of your face (I'm talking nose, cheeks the lot!) You definitely want something long lasting. I love the Rimmel Apocalypse in the colour Big Bang for this. Be warned, this is a full on bright red, but the doe foot applicator means its really easy to apply and once it's set it will not move! The Mac lipstick in Ruby Woo is another that likes to stick around. Both of these can be a little bit drying so I would recommend popping a little bit of lip balm underneath first.
If your feeling brave then you have to go bold! For me this is going for something a little bit different on the colour spectrum. I love the Revlon super lustrous lipstick in the colour fire and ice as it's a gorgeous bright red with a really warm orangey undertone. It is full on but looks really nice on the lips. I also love the Revlon lasting finish by Kate lipstick in 01 as it's a little bit darker and more vampy. This is great for a night out as it's really sophisticated and glamorous.
So there we are. I hope you enjoyed this post. As you can see from the amount of red lipsticks I own that I really do love them. I hope this helped some of you out, I hope to see a lot more red lipstick going out and about from now on!

10 Feb 2015
Valentines make up look
I kept my skin light and glowy (as I always do ha) by using my YSL touch eclait foundation. I also used my Maxfactor CC corrector stick under my eyes to get rid of any dark circles and then went over this with the the Rimmel wake me up concealer to make my eyes look nice and bright.

Labels:
bare minerals,
beauty,
benefit,
loreal,
makeup,
maxfactor,
rimmel,
soap and glory,
valentines,
ysl
Contouring: The easy way
Hello!
What's in the picture
-Tropic blushing sclupting palette
-Loreal glam bronze
-Barry M natural dazzle bronzer
-Topshop glow
-Tropic contouring brush
-Real techniques contouring brush
-Real techniques cheek brush
To contour this way I like to apply my concealer and foundation first so my skin's nice and even. I personally like to use an angled contour brush to apply the bronzer. Make sure the bronzer you chose is matte so it creates a shadow. You simply pull a duck face and such in your cheeks then start applying the bronzer top the hollows of your cheeks. Less is definitely more and blend blend blend.
I then like to add a little blush to the apples of my cheeks and then use a highlighter along any high points on my face. Again, keep it light, you can always add more if you need to.
So there you have it! Nice and simple, this is definitely my preferred way of contouring as it's just a little bit easier. If you missed the first part have a look here to see it. Hope you enjoyed!

6 Feb 2015
The YSL touche eclat dupe
Hello!
Regular readers of TheRobynChristina will know what a big fan of the YSL Touch eclat I am. I've mentioned it in almost every post recently. This sadly means that it probably won't last too long and at around £25 a pop it isn't something I'm too keen to re-purchase. You can imagine how happy I was when I discovered the Loreal lumi magique stylo touche de lumiere (world's longest product name). It is almost identical, like literally the same product. YSL is actually owned by Loreal so they often have very similar products and of course are always much more affordable. The Loreal version is around £8.00 which I am much happier to pay.
The only difference I can really see is that the Touch eclat is slightly more pink toned which may work better for under the eyes than the Loreal version but apart from that they are very much the same. The beautiful packaging of high end products can sometimes sway me but with these two even that is almost identical. Basically I think I know which one I'll be reaching for in the future.


4 Feb 2015
Contouring: The Kimmy K Way
Hello!!
To create strange picture number 1, I used the Maxfactor yellow CC stick and the Loreal lumi magique stylo touche de lumiere (these products have very long names). I used these on all of the high points of my face and the areas that I wanted to catch the light.
I then used the Bourjois bronzing primer on all the areas where I wanted to create shadow. I applied this with the Real techniques contour brush. At this point you look like an extra from the Lion King but it's all starting to come together.
I then applied a small amount of my YSL touch eclait foundation to even everything out which I applied using the real techniques miracle complexion sponge.
And taa daa you have a more sculpted face! It's not showing up as well as I would have liked in the picture but it does create a really nice effect. I think this would work best on darker skin, paler skins have to go a little bit more delicately or risk looking like they've been tangoed. You could also go over this and add some more highlighter to make it extra glowy.
I hope this was helpful. I'll have a second contouring post up soon to show a slightly different technique so remember to keep popping back.
Labels:
beauty,
bourjois,
contouring,
kim kardashian,
loreal,
makeup,
maxfactor,
real techniques,
ysl
Subscribe to:
Posts (Atom)